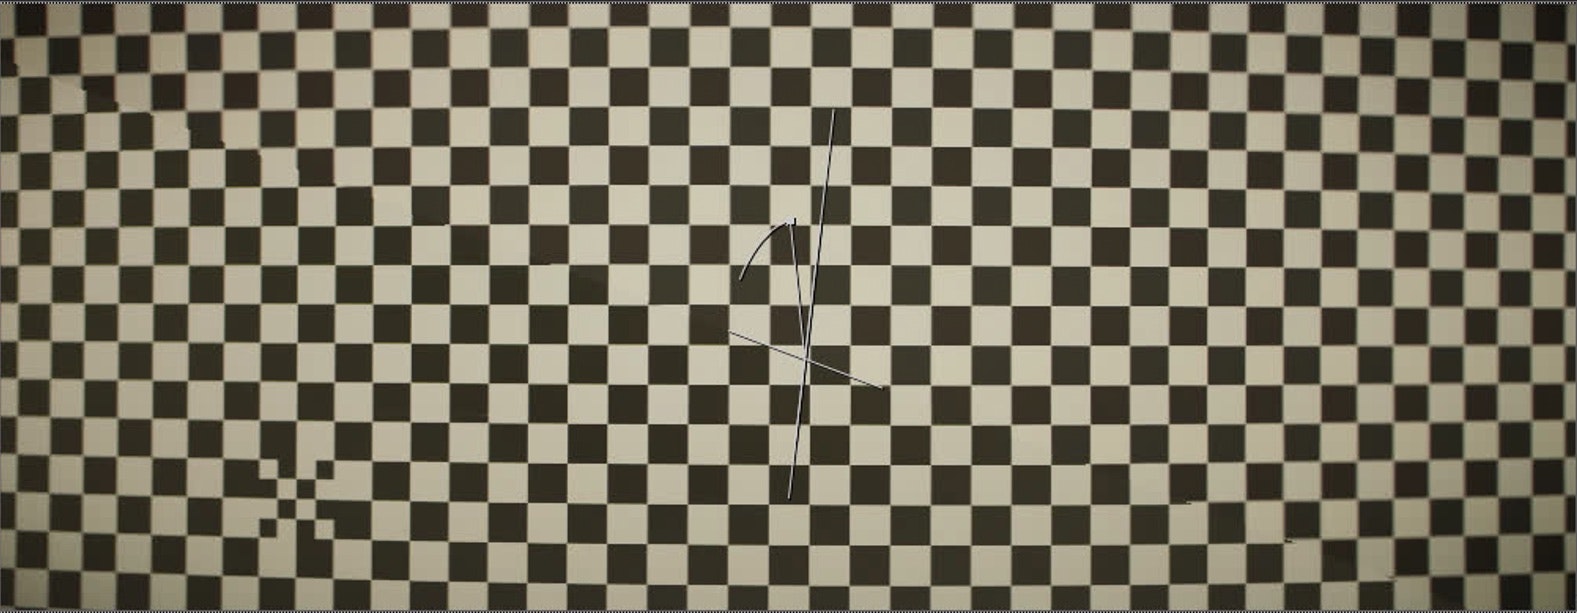
There is more to lens grids than just distortion...
Lens Grids are of course great to reproduce the lens distortion when comping CG (and to undistort the plates for tracking) but they can also help reveal other lens characteristics.
I developed a technique to recreate lens characteristics based on shot lens grids, that I want to share here with you.
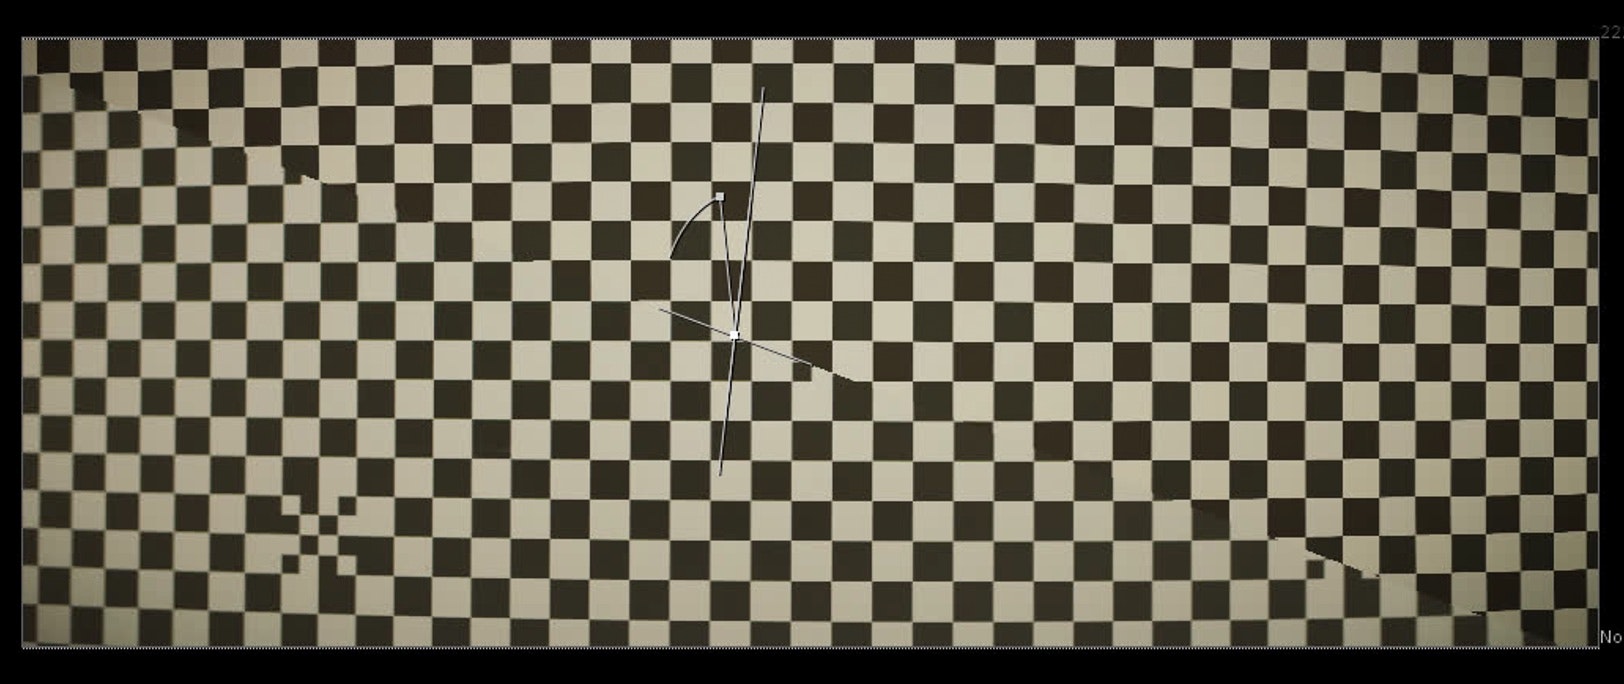
The checkers are actually quite good to get a sense of the field curvature, the chromatic abberations and the spherical abberations and with some workarounds you can also see and replicate the vignetting of the lens.
Getting those subtle details into your comp makes all the difference, when aiming for photographic realness and without a ground truth it is hard to get them right.
Summary
If you don't want to read the whole thing here is the Summary and the finished script.
The shot lens grid is my ground truth to match the lens characteristics.
I am creating a checkerboard in Nuke that matches the lens grid we shot in appearance closely, so I can apply all the lens characteristics to the Nuke checkerboard by matching what I see on the shot lens grid.
In the end the clean Nuke checkerboard should be as close as possible to the lens grid we shot in regards of the lens characteristics (and look). The finished setup can then be distributed to all comp shots that are using that lens.

The steps we are gonna do are:
1. Creating a clean Checkerboard "Lens Grid" in Nuke
2. Match the vignetting of the lens
3. Match the spherical abberations of the lens
4. Match the field curvature of the lens
5. Match the spherical aberrations of the lens
Alright, Let's dive into it!
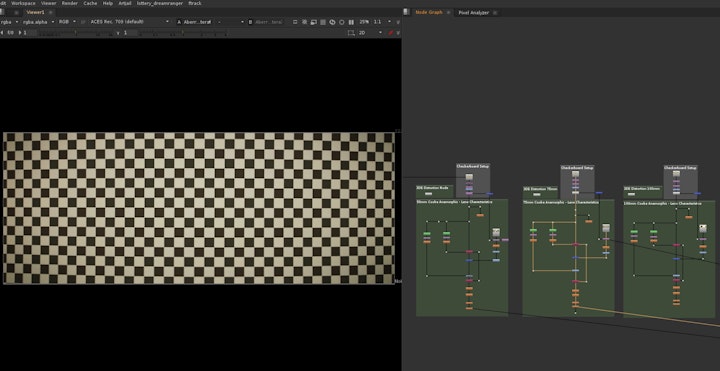
1. Create a clean checkerboard "lens grid" in Nuke
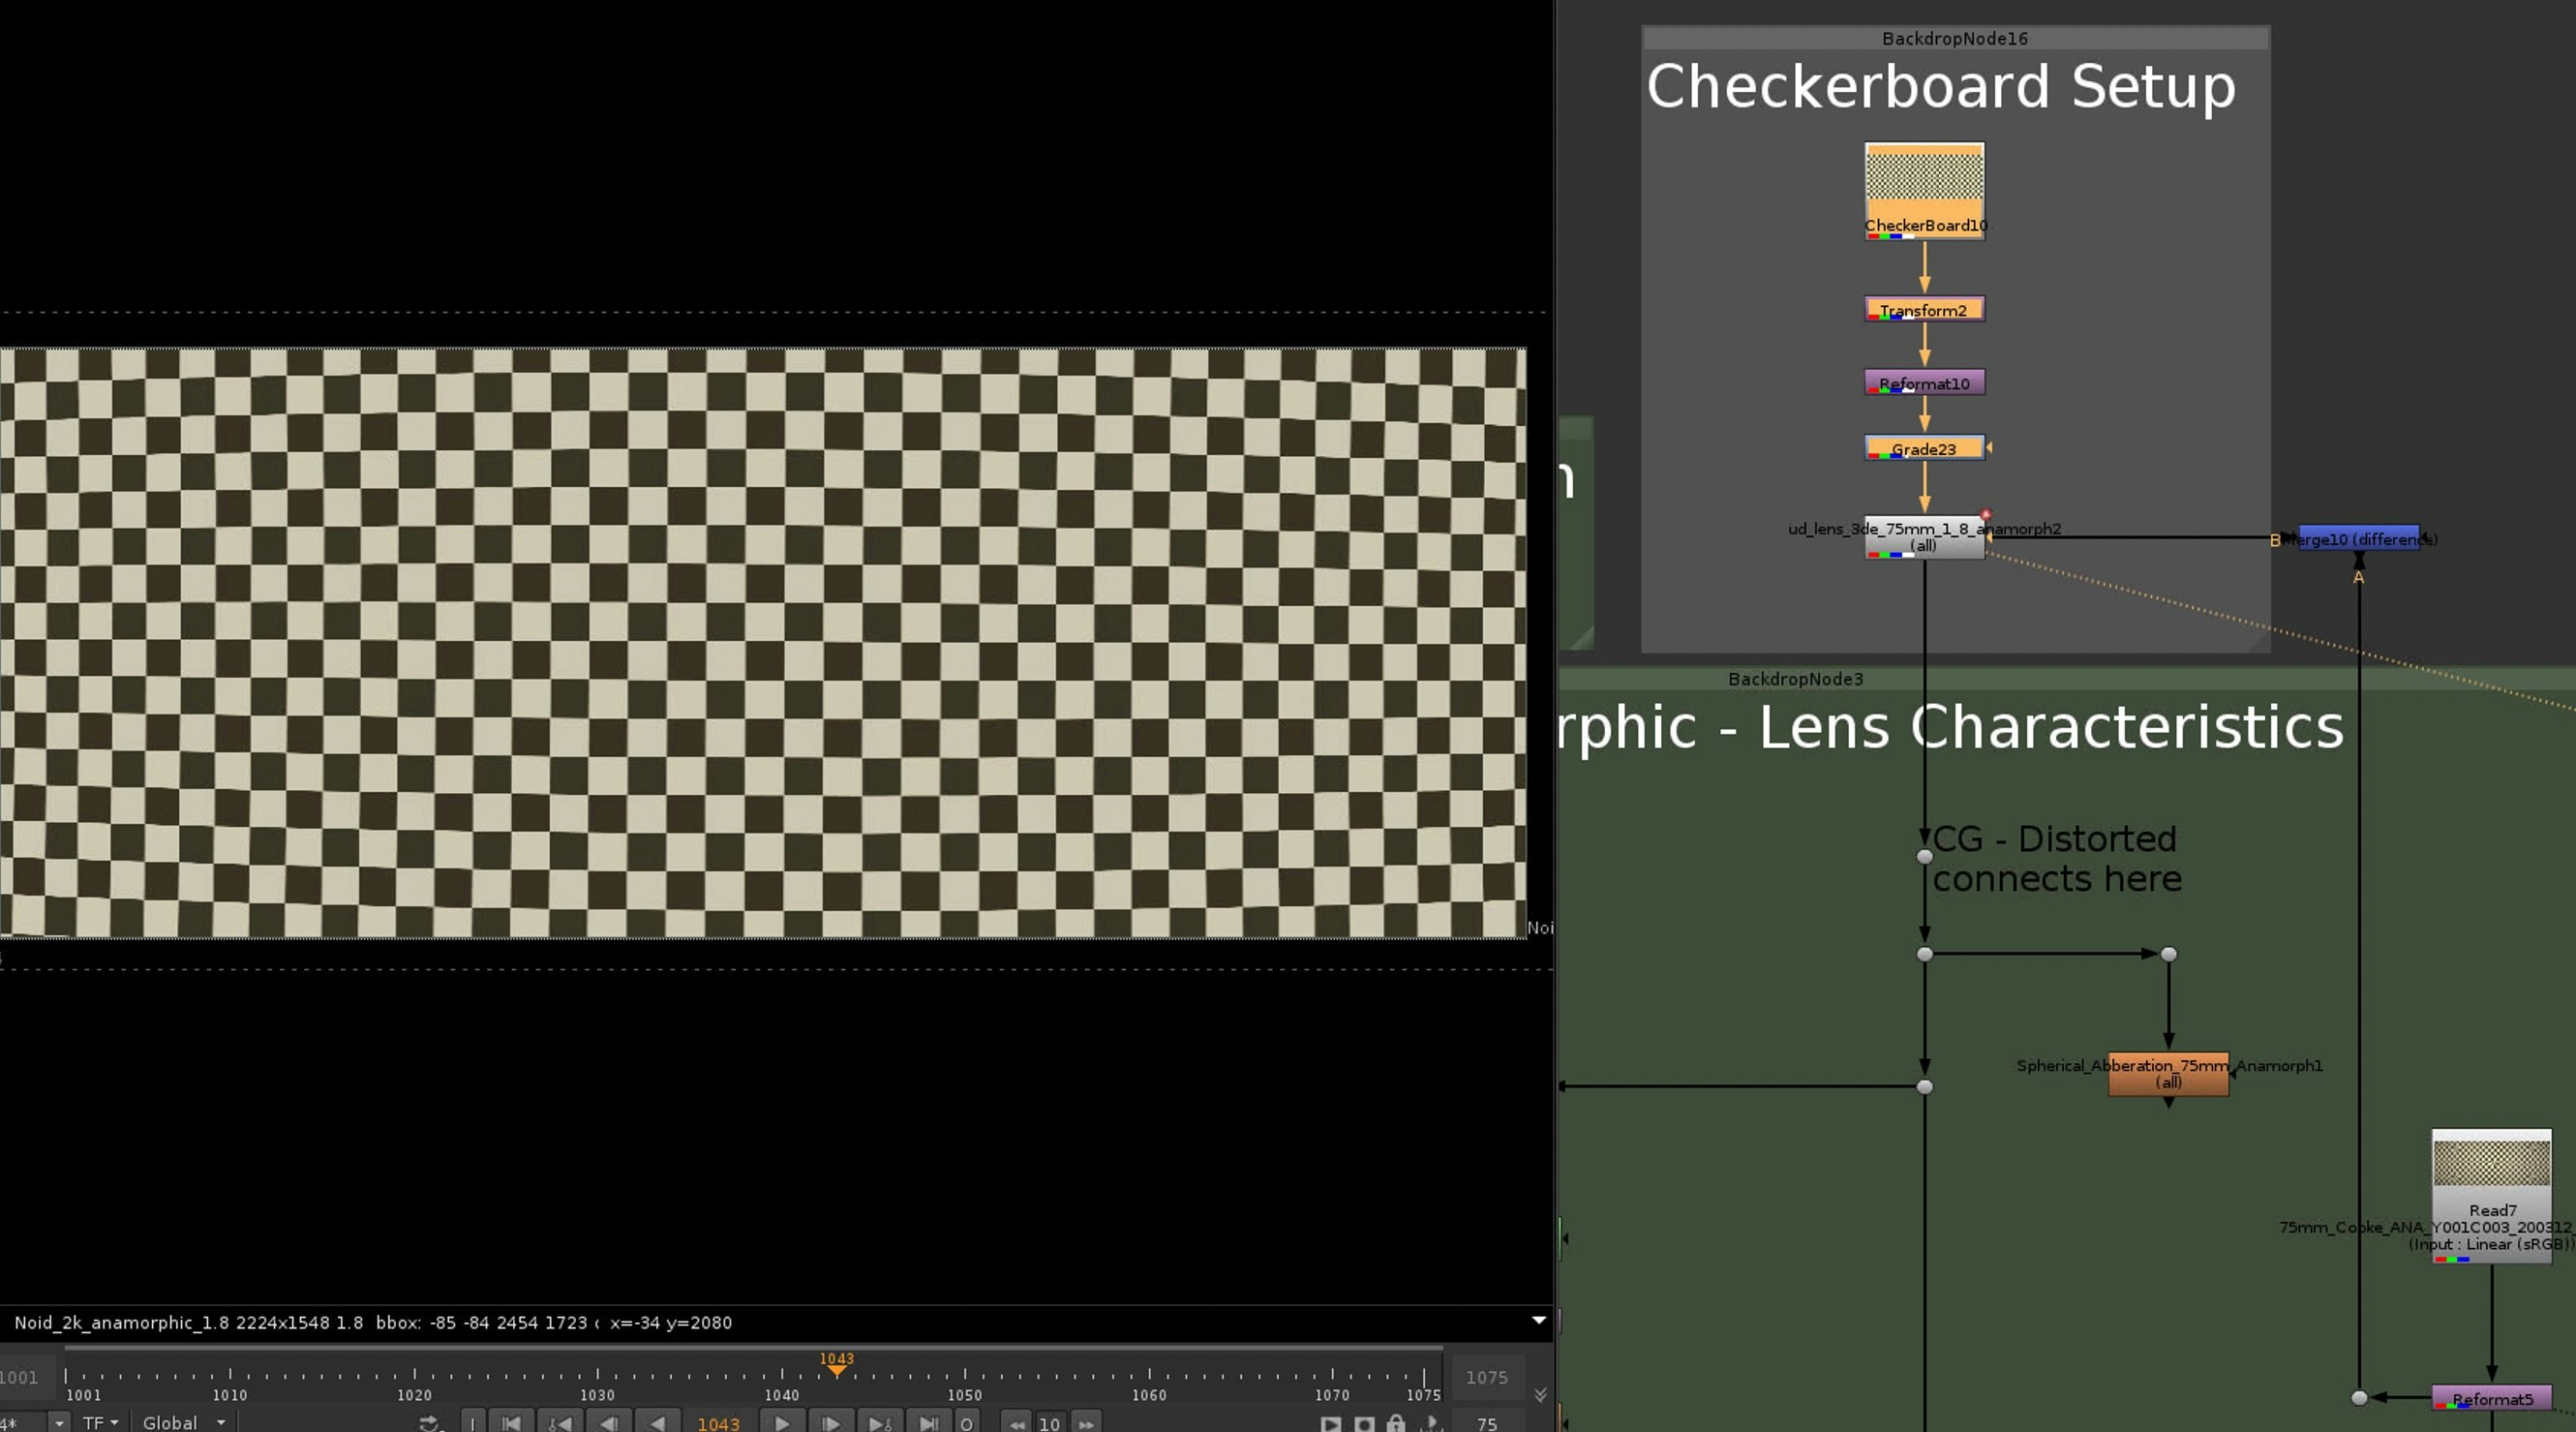
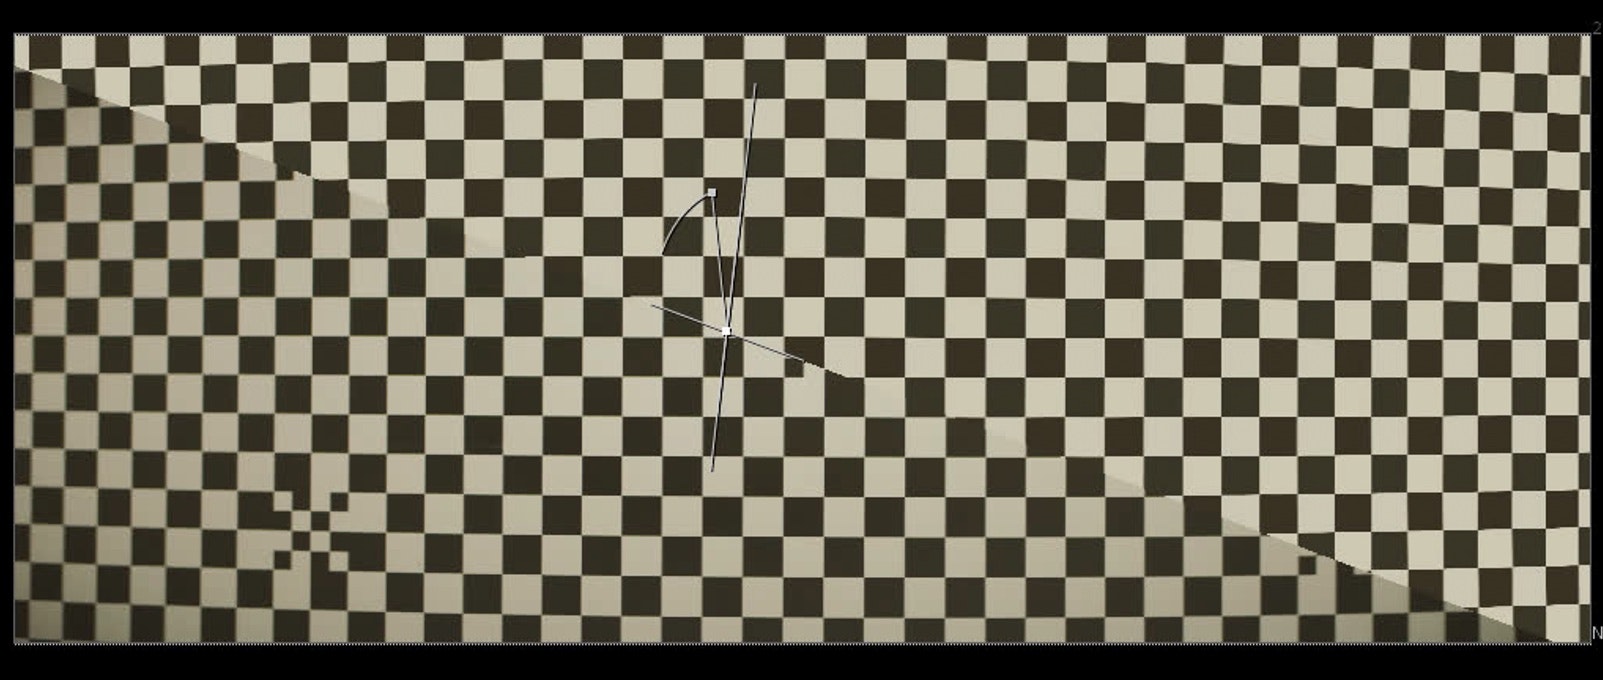
The first thing we need is a clean checkerboard in Nuke, it should have the same amount and size of checkers then the Lens Grid we filmed. To match the two I am using a grade node to adjust the color of my Nuke checkerboard and a transform node to move it around slightly for a better line up.
Last step is to apply the lens distortion to the nuke checkerboard. We got 3D Equalizer Nuke nodes back from our friends at Track VFX (great tracking company by the way), that is what you can see in the Setup.
2. Matching the vignetting of the lens
To match the vignetting of our lens, we can do two things.
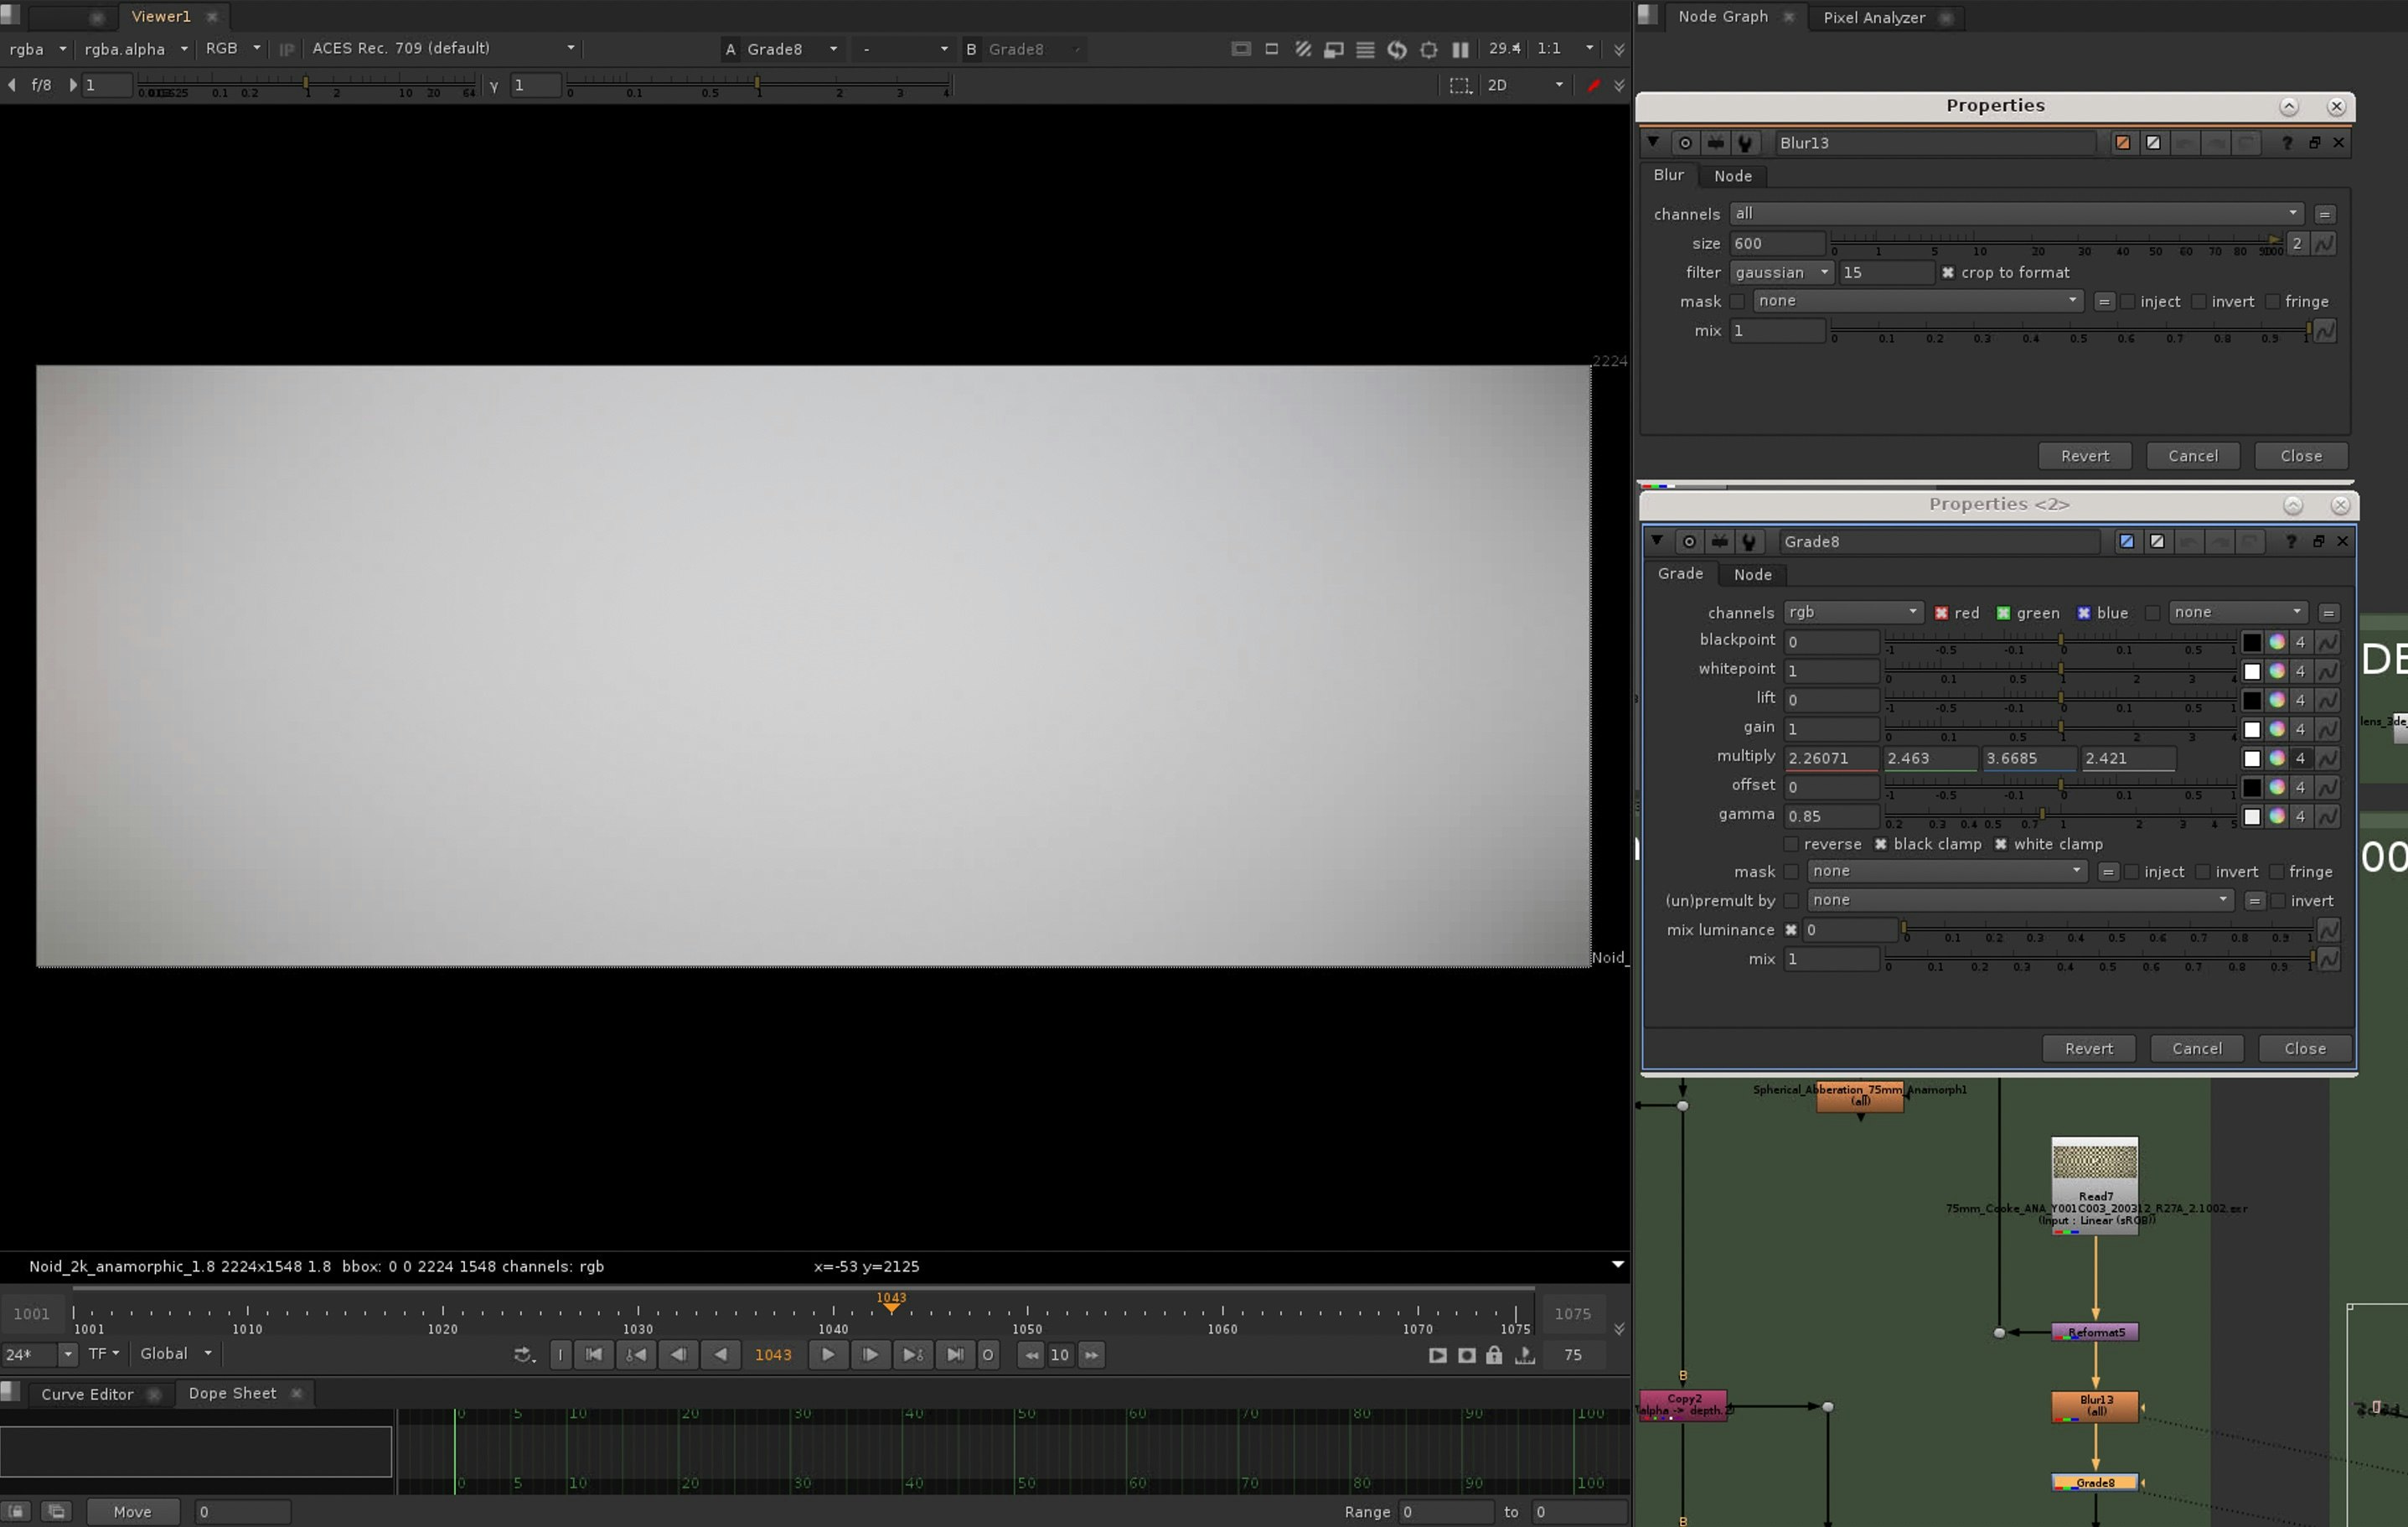
First I am blurring the shot lens grid until it is just a gray constant. Next I am grading that gray value brighter (multiply or gain) until it is fully white in the center of the image. Clamp white should be on in the grade node, to avoid values above one.
Since the vignetting of a lens is only visible on the edges of the image the center of the blurred lens grid should be white now and the edges should have a radial gray gradient. The result can be multiplied with our clean checkerboard (merge node).
In a second step I am adding a bit of extra darkening at the far edges with a roto shape and grade node.
In an ideal world we would shoot a white or gray board for each lens while shooting the lens grids, to recreate the vignetting of the lens properly. But the trick with the blurred lens grid also works.
Here is the nuke checkerboard with the vignetting applied, compared against the shot lens grid. It is already getting closer...
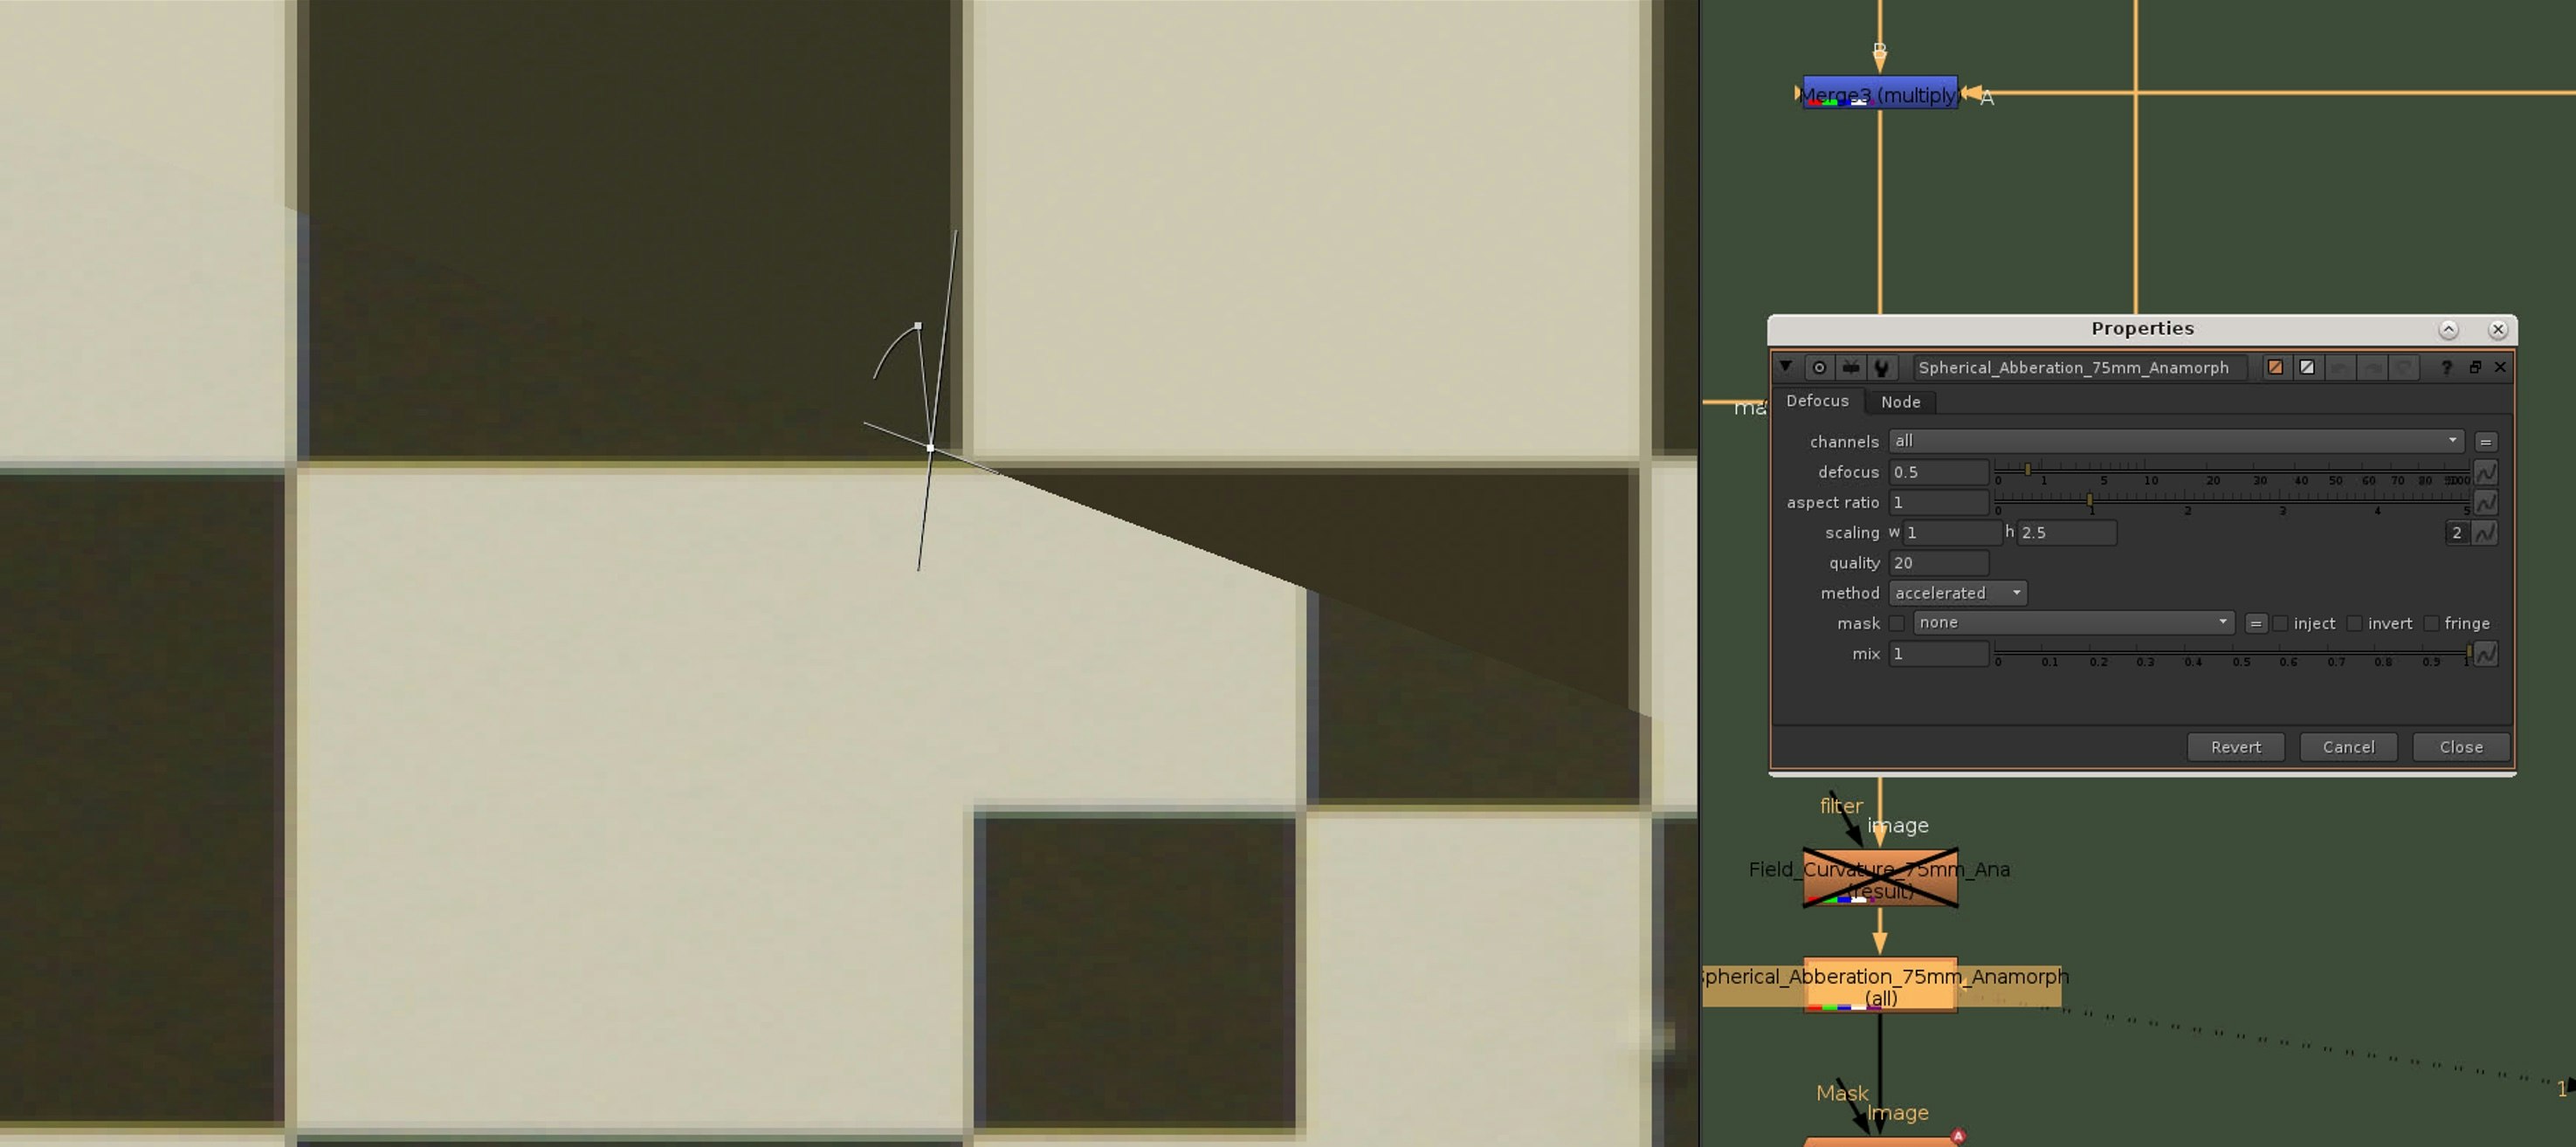
3. Matching the spherical abberations of the lens
Spherical abberations are the general softness of the lens, due to the lens not being able to focus all light rays perfectly back to a point. Different than the field curvature the spherical abberations are affecting the whole image. So yes, spherical aberrations is the fancy word for "add some softness to your CG".
The next step is to check the center of the lens grid, zooming in and recreating the blur amount there with a defocus node. Checking at the edges of the image would result in the spherical abberations and the field curvature adding up, that is not what we want.
Since this is a matching step, I usually switch between shot lens grid and clean Nuke checkerboard with the defocus node to get it accurate.
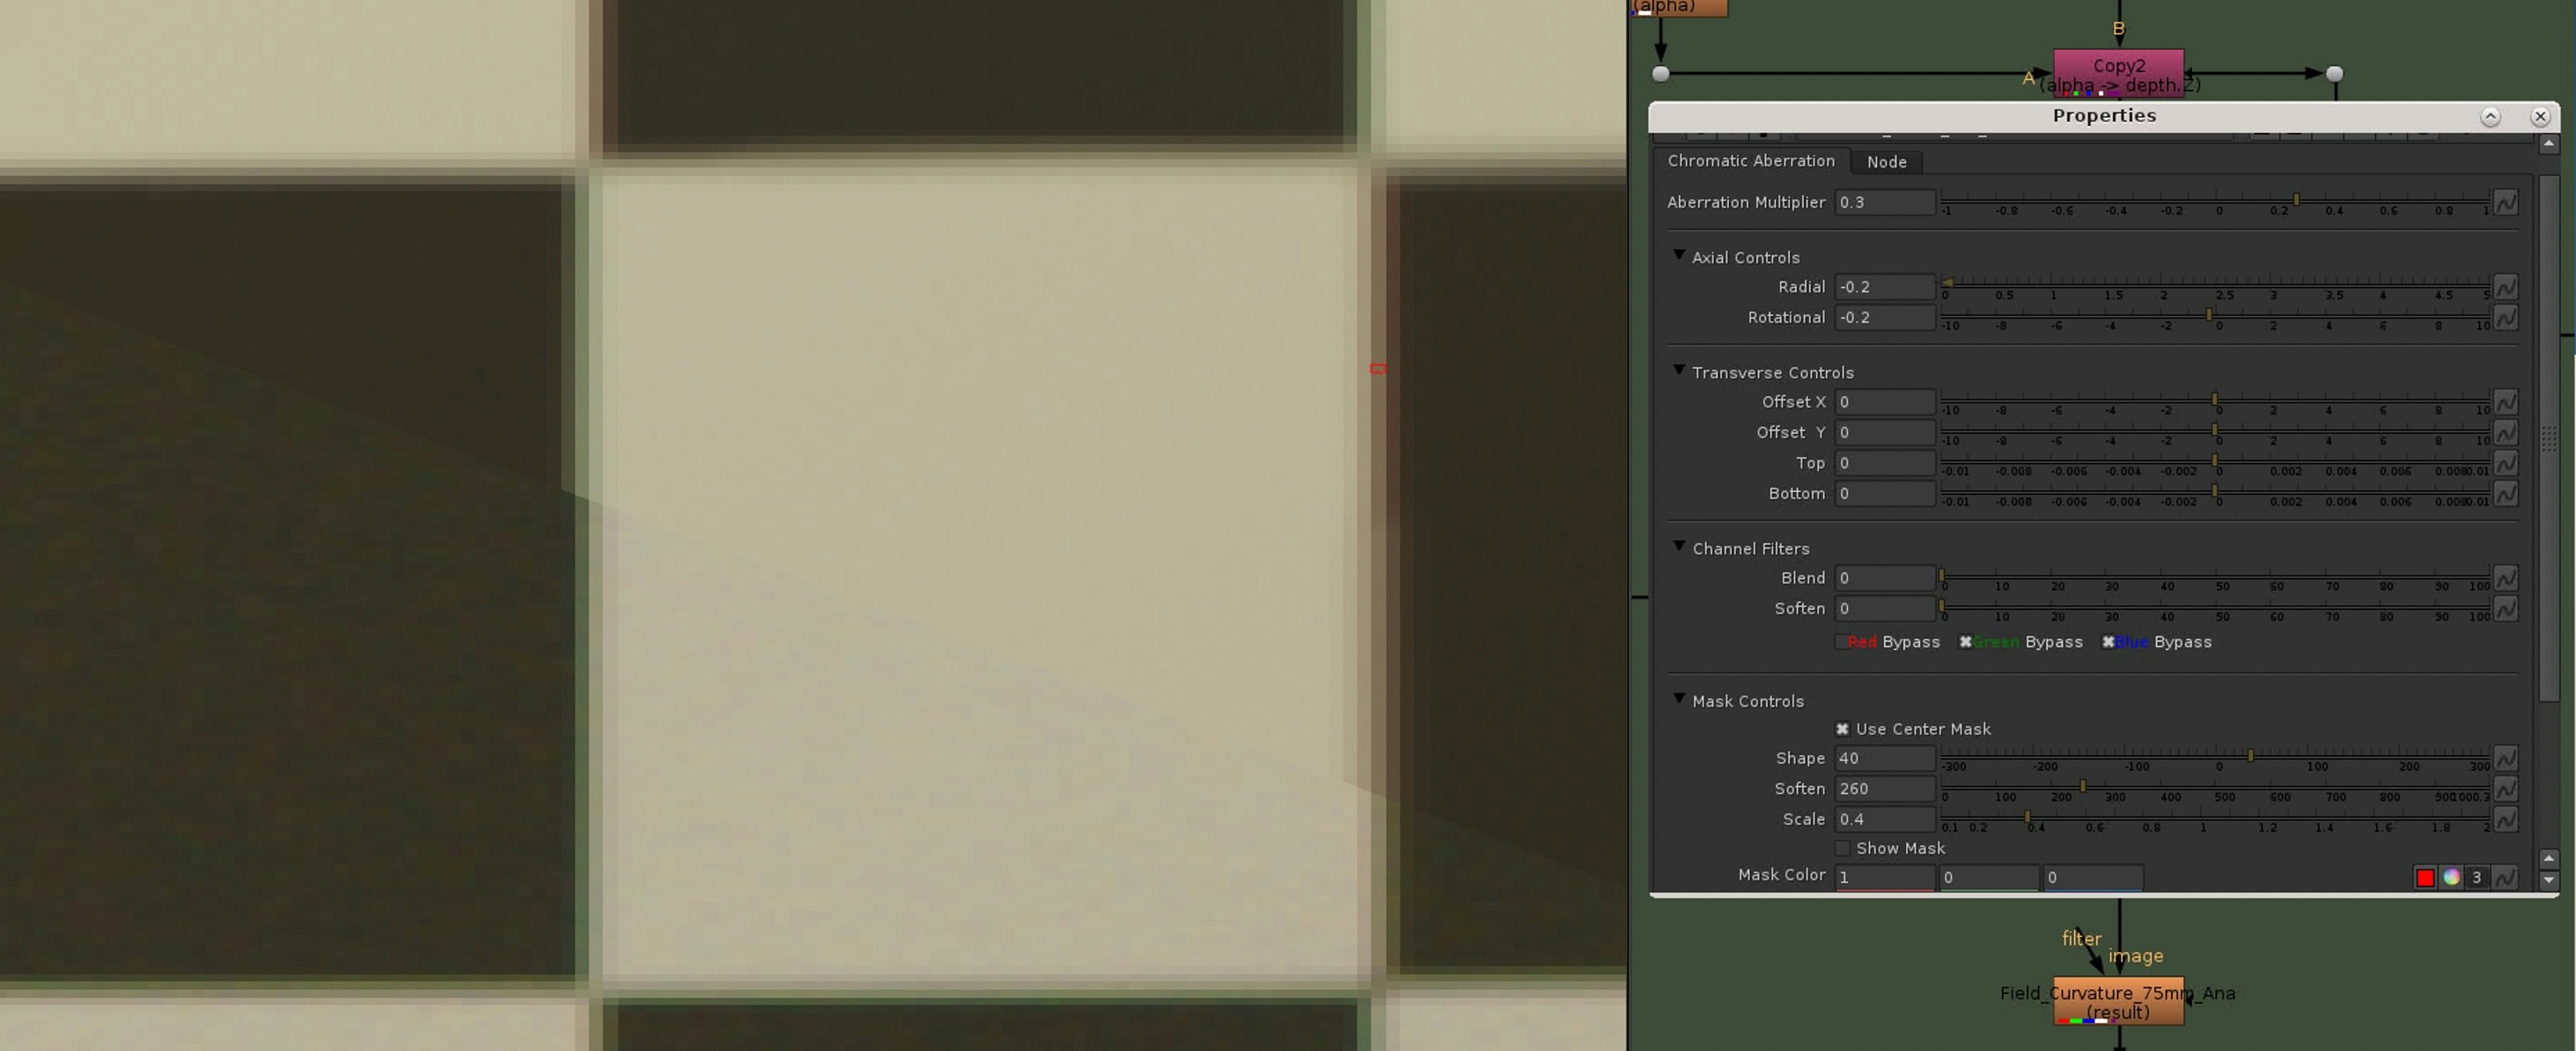
4. Matching the field curvature of the lens
The field curvature is visible as a softness at the edges and corners of the image, not at the center. This happens because a spherical lens would focus the object plane on a curved surface in image space, but the sensor, where the image is projected, is a plane. So the light rays at the periphery of the sensor are focused slightly in front of the sensor plane producing the softness.
Recreating the field curvature in Nuke is another step that needs manual comparison between the shot lens grid and our Nuke checkerboard.
First I am checking where the field curvature starts to kick in on the lens grid by zooming in and going from the center horizontally to the edge. When I found that area roughly I am creating a roto shape covering those boundaries.
The roto shape can be blurred as much as needed and the alpha is copied into the depth channel.
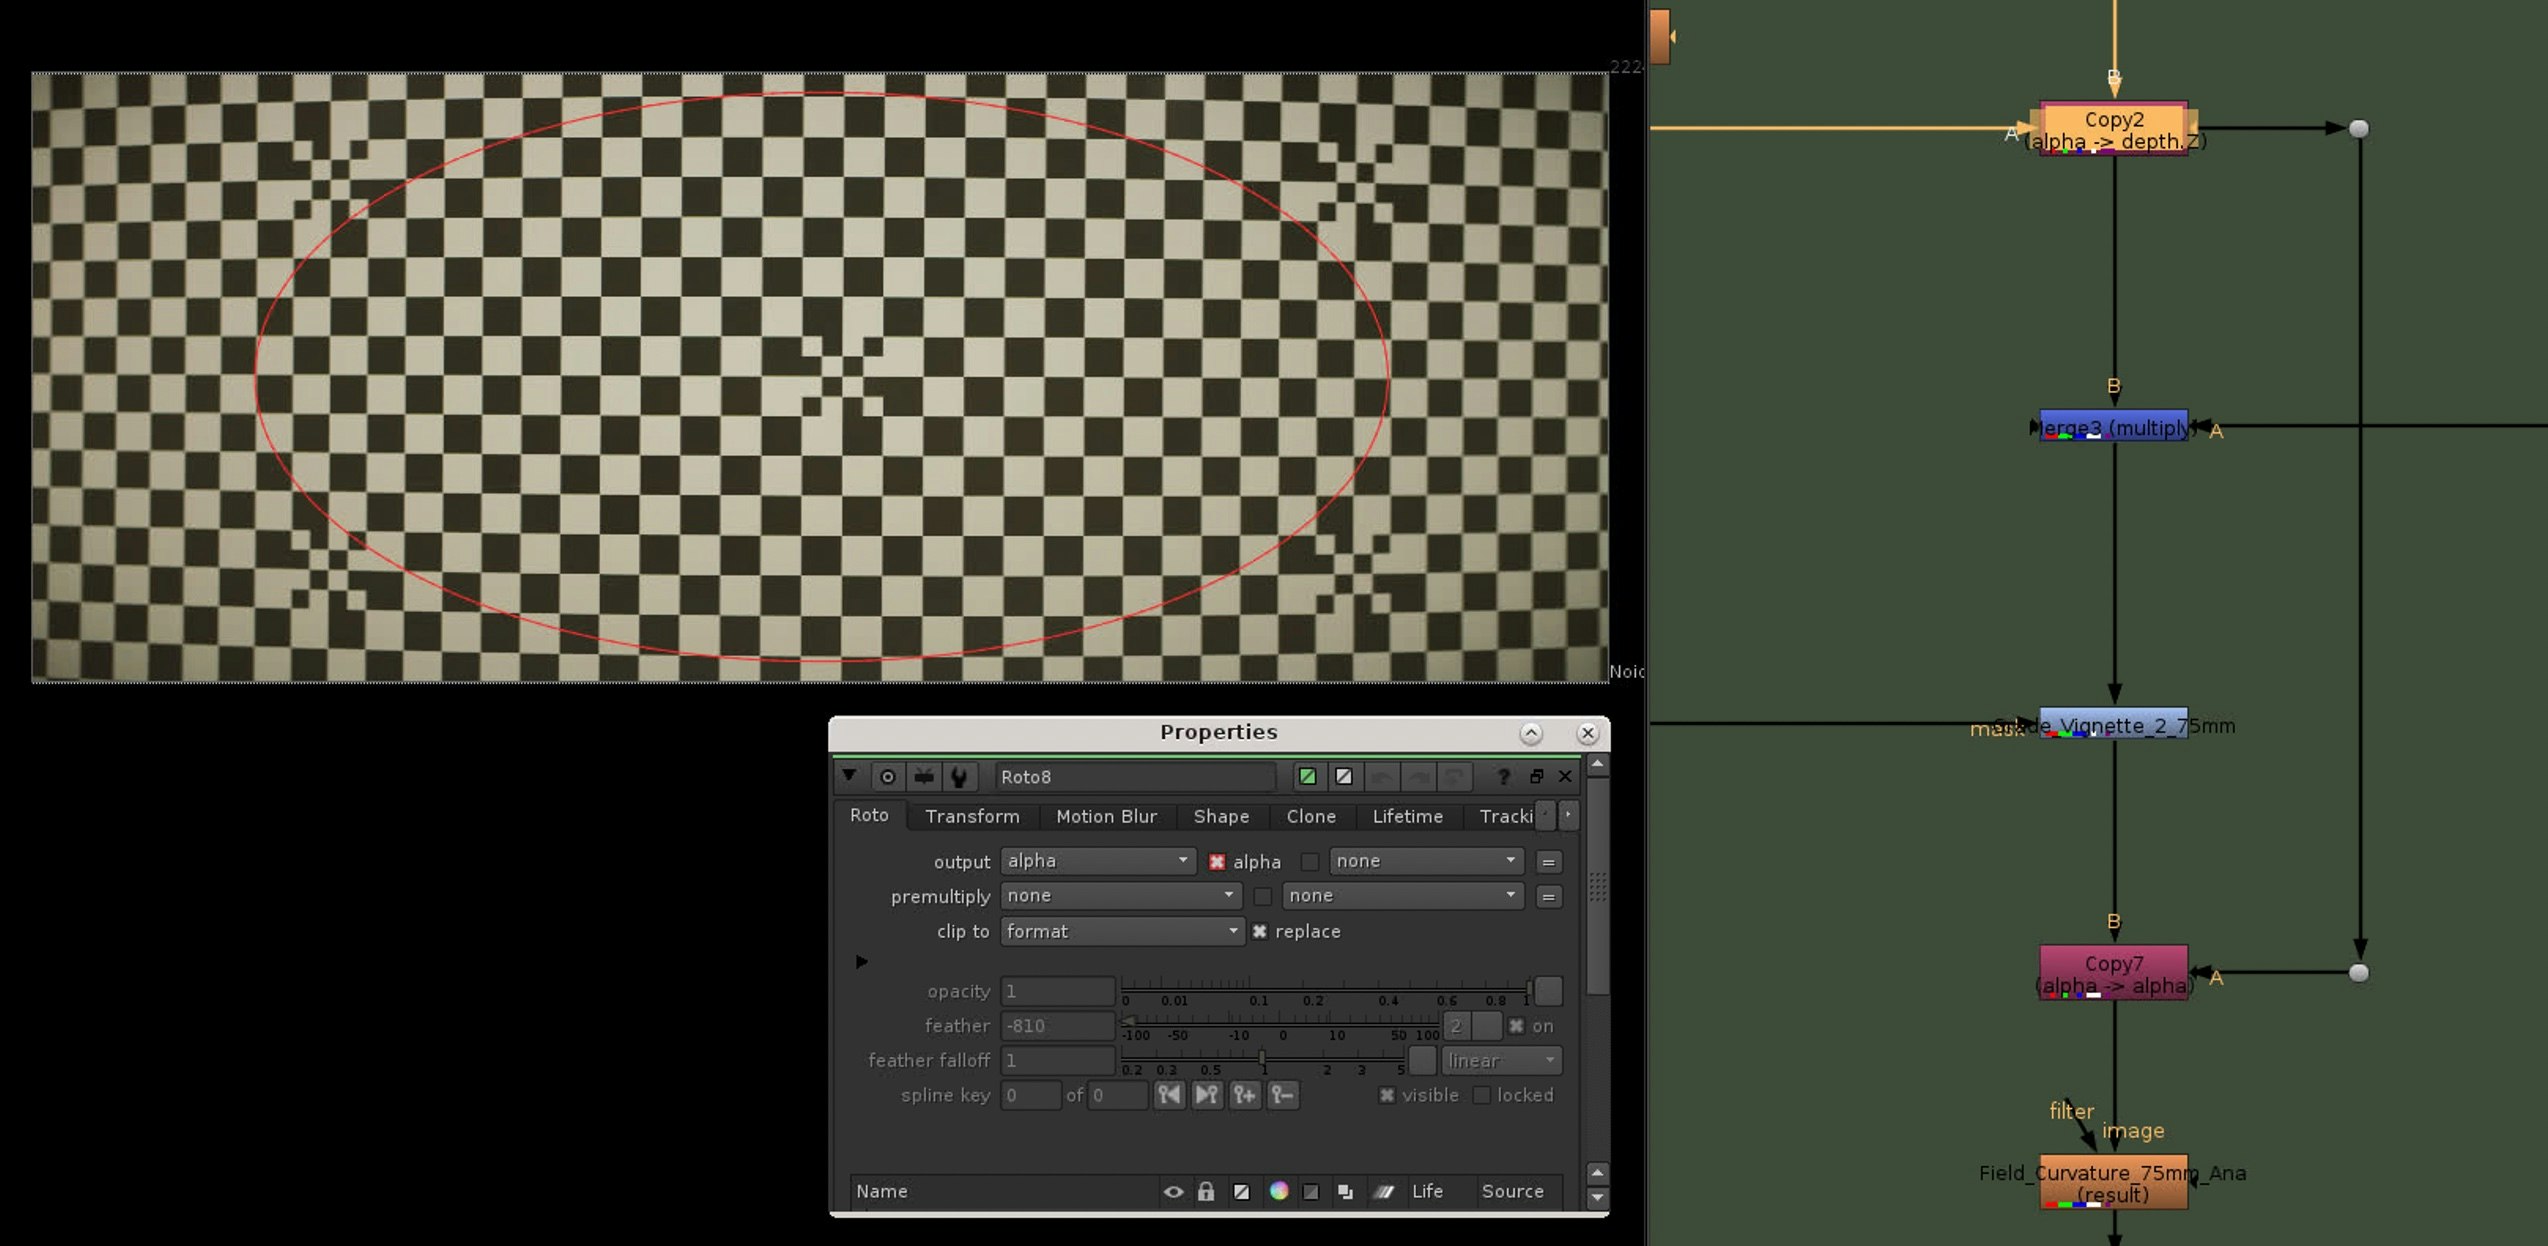
We can now dial in the defocus of our checkerboard edges with a Z-Defocus node, comparing between the Nuke checkerboard and the lens grid.
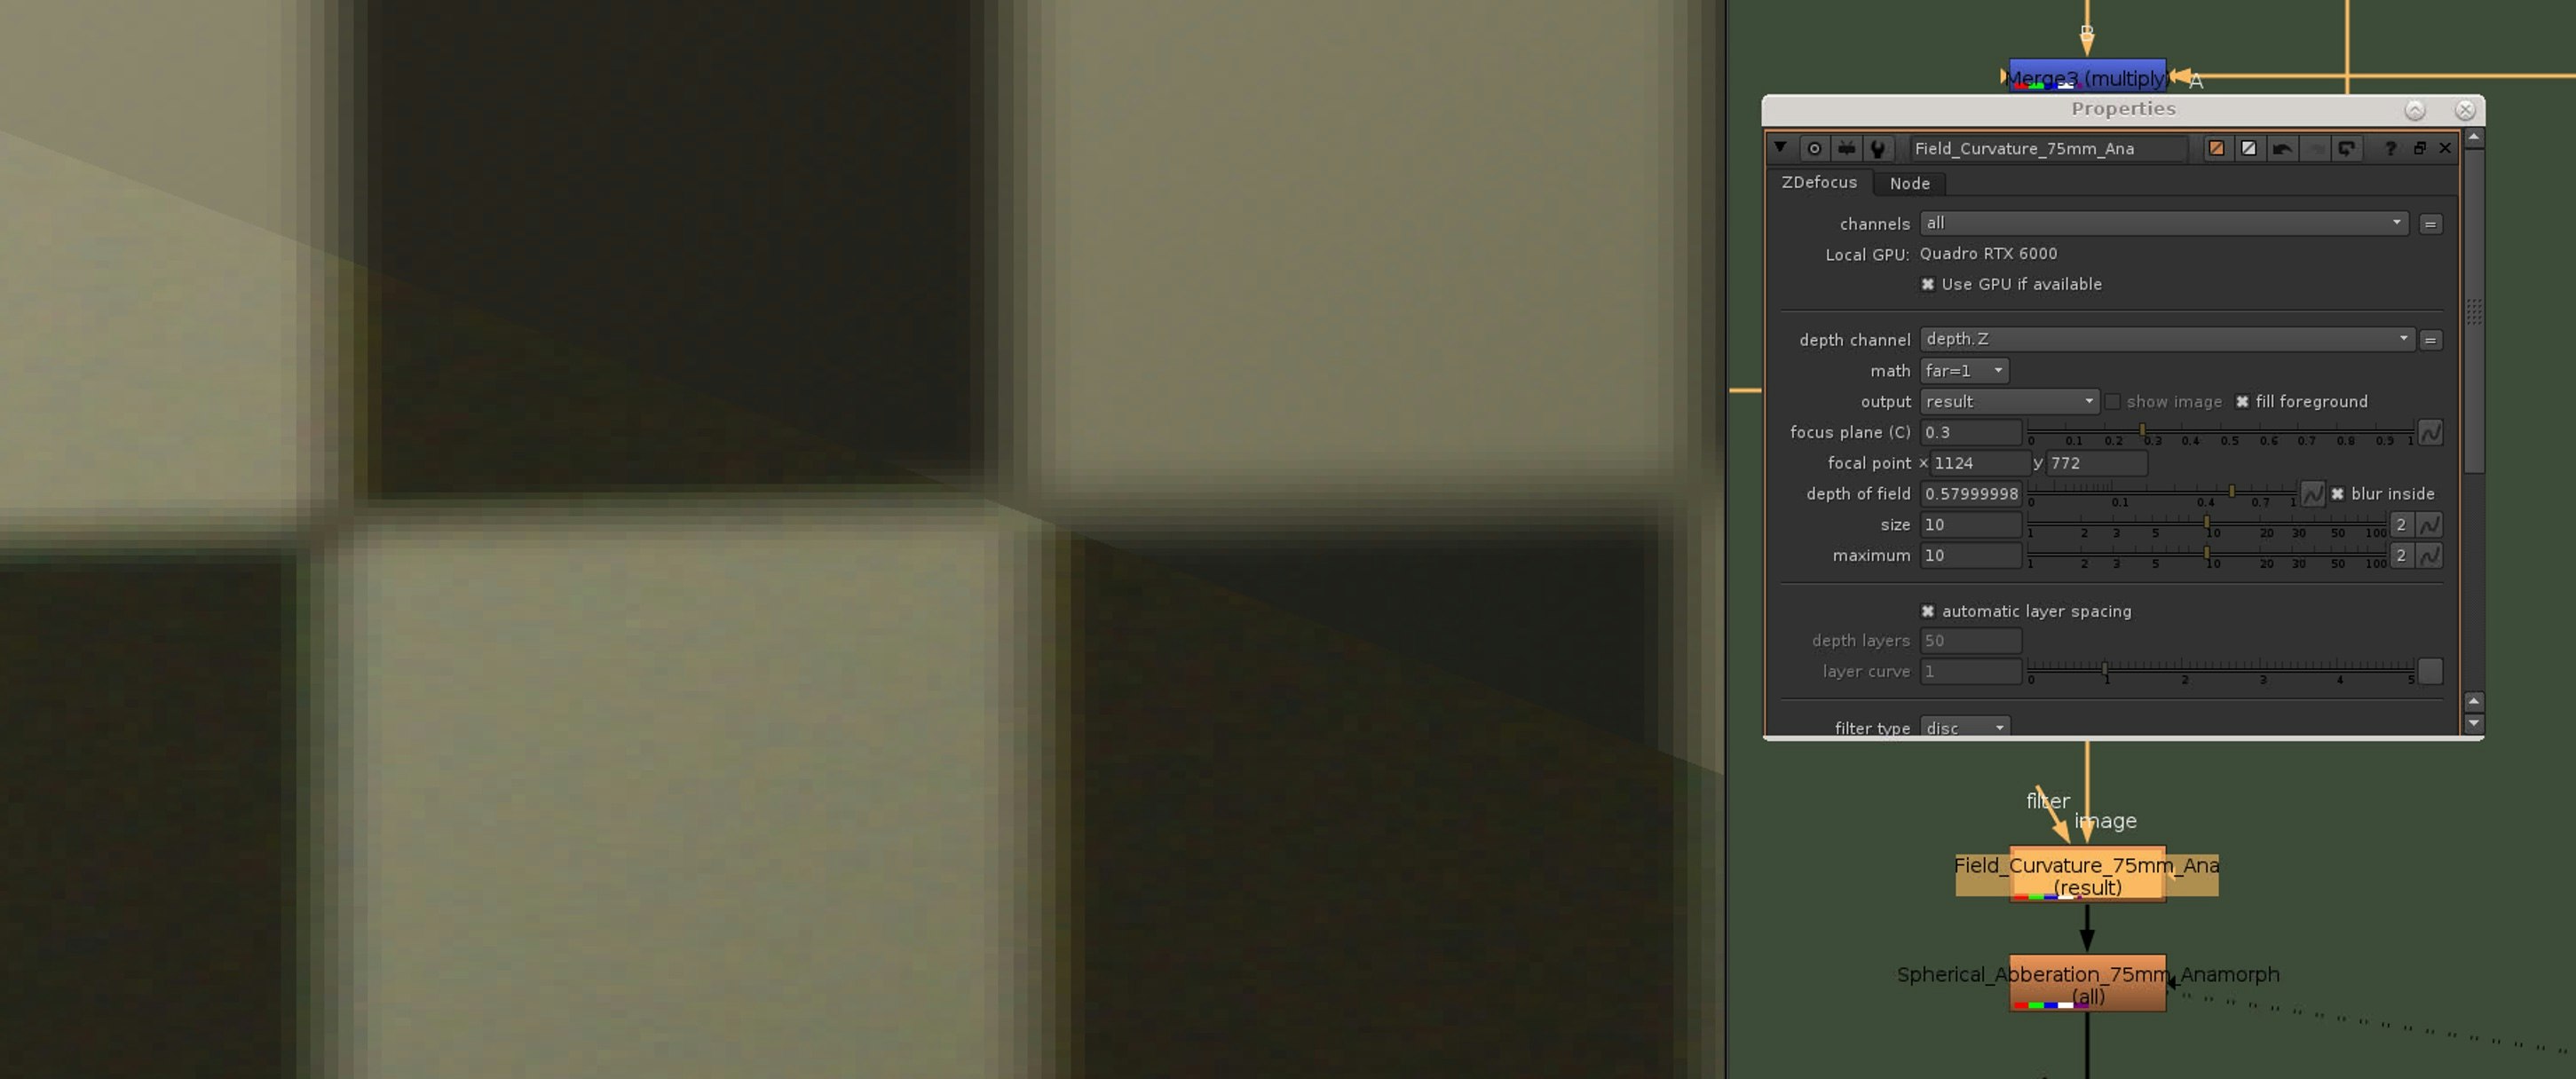
In the example you guys see here I am copying the alpha of the blurred roto into the depth channel and later use a Z-Defocus to dial in the field curvature. This seems to be giving a nicer gradient from not soft too soft, instead of plugging the alpha into a defocus node directly. It is a subtle difference, so whatever works best for you here.
5. Matching the chromatic abberations of the lens
The last step, is matching the chromatic abberations of our lens, there are two types of chromatic abberations in a lens, axial (longitudinal) and transverse (lateral) chromatic abberations.
Longitudinal chromatic abberations are only visible at the edges and corners of the image, while lateral chromatic abberations will be visible everywhere.
I am using the abberation gizmo from Jason Bidwell, because it offers nice control over lateral and longitudinal abberations.
Referencing the lateral abberations at the center of the shot lens grid, I am dialing in the right amount with the transverse controls in the gizmo.
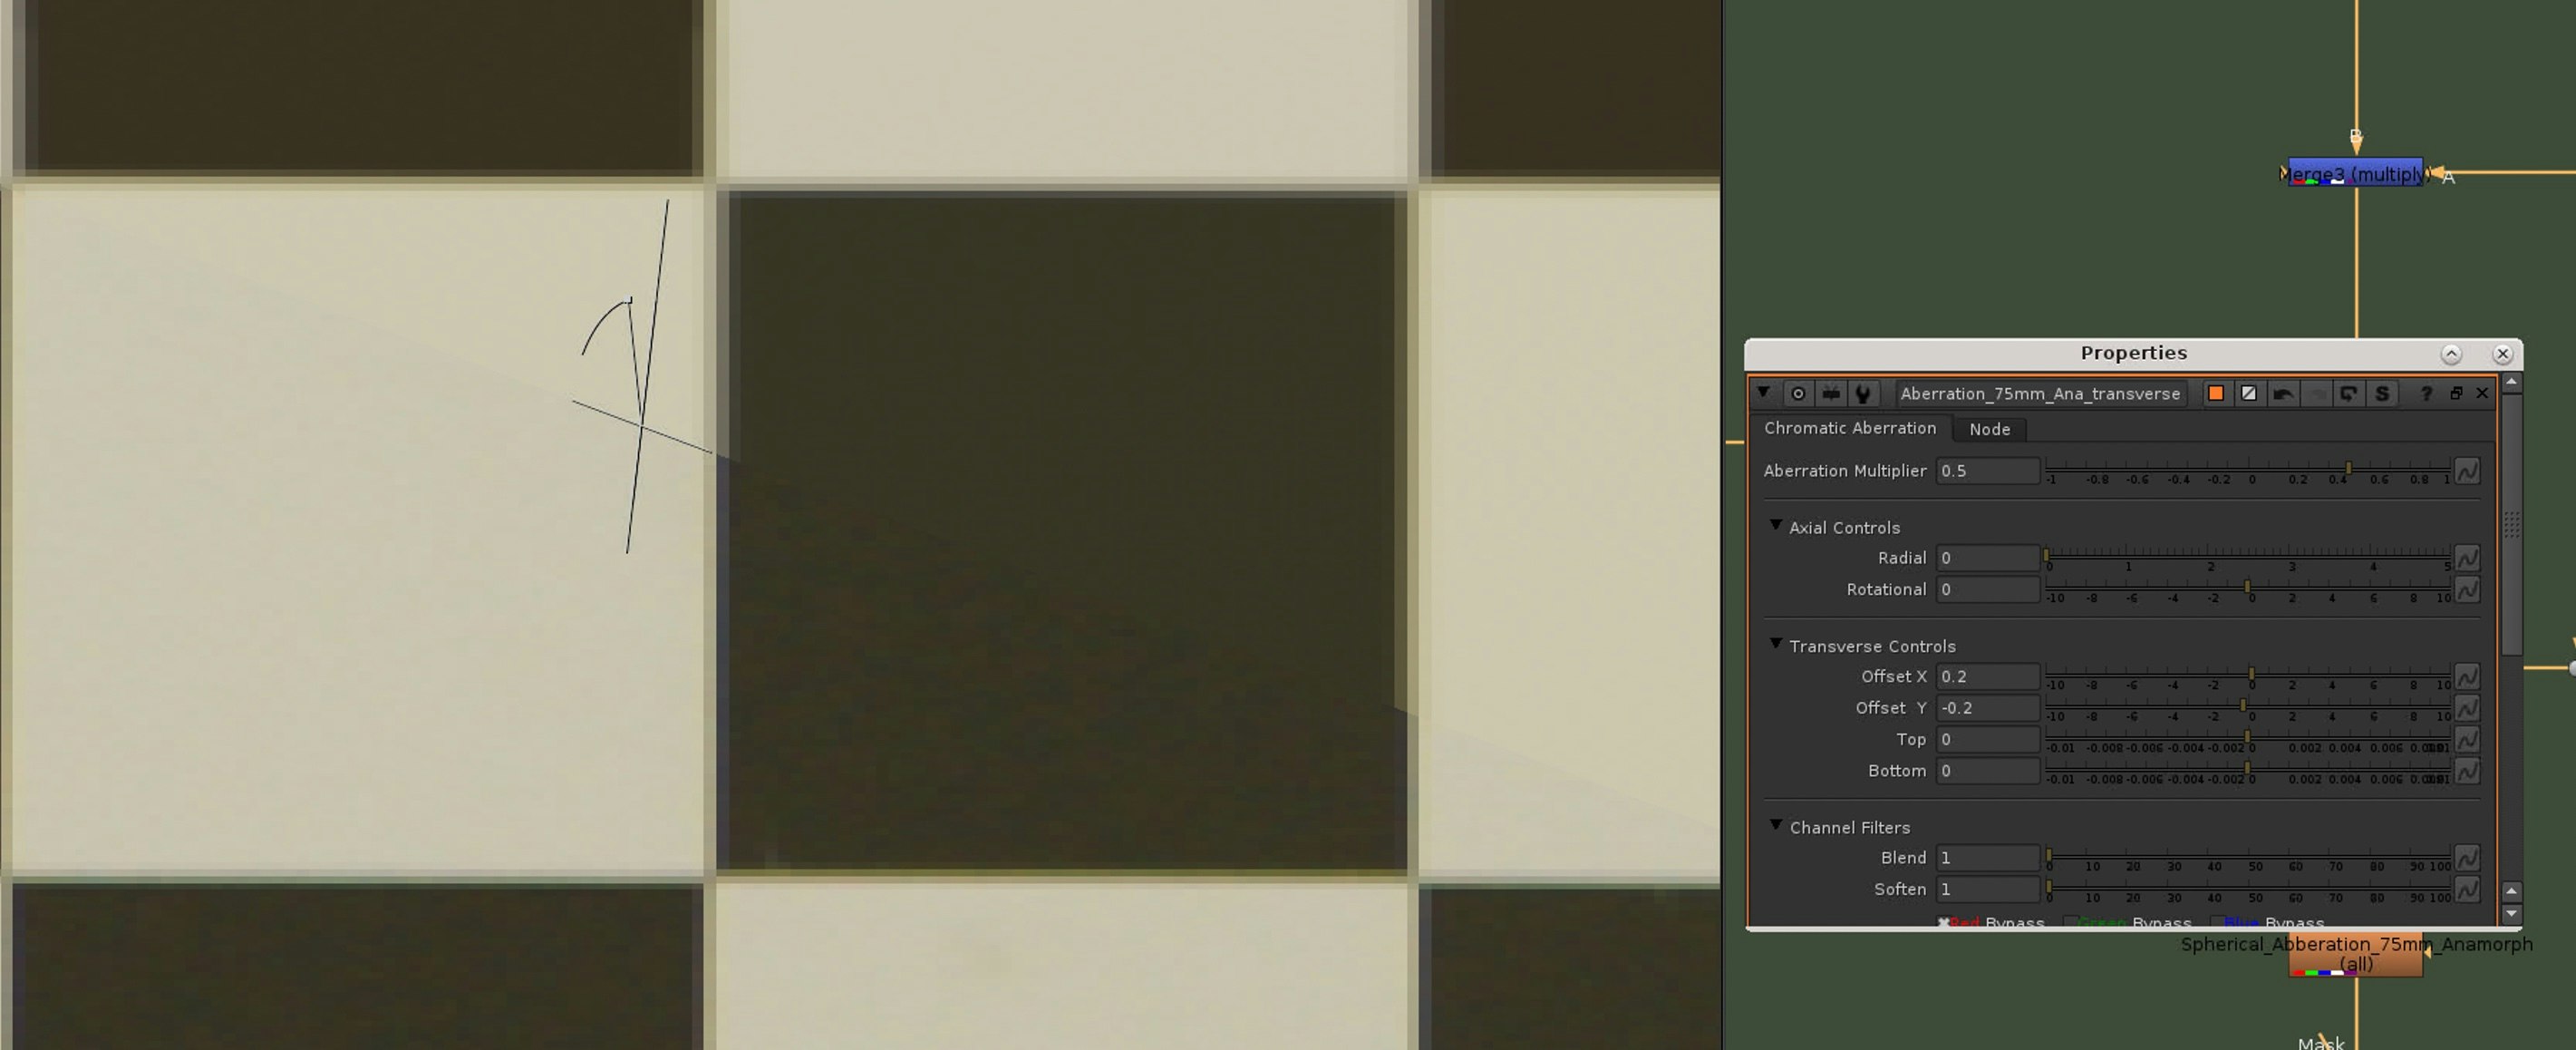
To match the longitudinal chromatic abberations I am comparing the lens grid at the far sides against the Nuke checkerboard, until they are matching as closely as possible. In Jason Bidwell's gizmo that is done with the axial controls.
6. Add it to your comp
That is it, the two lens grids should be matching quite good now and the Nuke setup can be used in your comp
The lens setup (without the nodes to create the Nuke checkerboard at the beginning) can be plugged into your CG comp after you applied the lens distortion and before you are combining it with your life action plate.
Last Thoughts
The technique I showed is using the bare minimum I would expect when preparing and shooting a spot that is using CG and life action plates, lens grids and it will provide a great ground truth to recreate lens characteristics in your comp.
Some of the lens characteristics we want to recreate are influenced by the f-stop/aperture opening of the lens. Very often stopping the lens down reduce these characteristics. So in an ideal world we would have multiple samples with different f-stops to match them even better.
Weta seems to be doing lens characterizations for each lens used on a shoot and they also specify cameras and lights with spectral measurements. It would be awesome to see how Weta is doing the whole process, so if anybody knows a guy that knows a guy...
I hope that this little walk through was helpful, please let me know if you guys have any questions, additions or corrections, hello@christophschroeer.com.